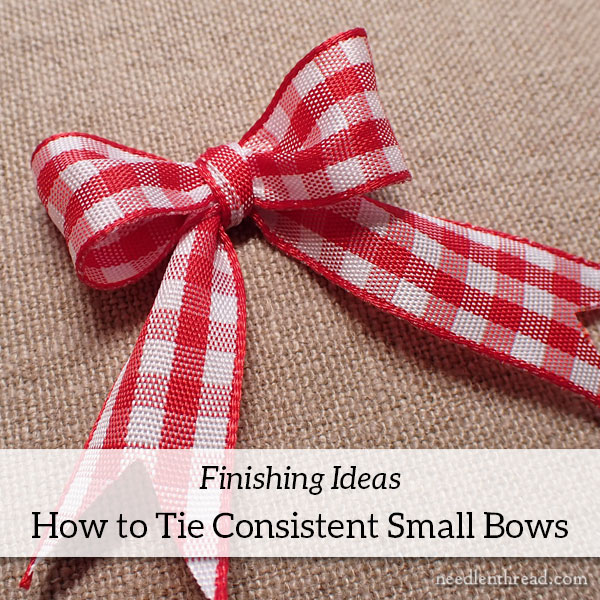
How To Tie A Perfect Ribbon Bow: Easy Steps & DIY Tutorials!
Could the art of adorning a gift, a wreath, or even your own attire be made simpler, more elegant, and less intimidating? The answer, surprisingly, is a resounding yes, and it all begins with the humble ribbon bow.
Tying a perfect bow, far from being a skill reserved for expert crafters, is a technique accessible to everyone. Many believe that creating a beautiful bow is a complex task, but as the video tutorial reveals, the reality is far more straightforward than one might imagine. With just a few simple steps and the right approach, you can transform ordinary ribbons into stunning embellishments.
The charm of a well-made bow lies in its ability to elevate any item, be it a carefully chosen gift, a festive wreath, or a celebratory tree topper. It adds a touch of elegance and personal touch that can make a significant difference. This is why mastering the art of ribbon tying is a skill worth acquiring.
| Aspect | Details |
|---|---|
| Skill | Gift Wrapping and Decoration |
| Difficulty Level | Beginner to Intermediate |
| Time Required | Varies (a few minutes to make a bow) |
| Materials Needed | Ribbon (various types), scissors, zip tie (optional) |
| Key Techniques | Knotting, looping, securing |
| Benefits | Elevates gifts and decorations, adds a personal touch, is a handy craft skill. |
| Where to learn | Many online tutorials and video tutorials are available, including DIY project guides. |
| Common Uses | Gifts, wreaths, Christmas trees, hair accessories, crafts. |
| Alternative Methods | Using pre-made bows, Bow makers, or specialty tools. |
| Related topics | Gift wrapping, crafting, holiday decorations |
| Reference Website | Martha Stewart - How to Tie the Perfect Bow Every Time |
Let's delve into the art of crafting the ideal ribbon bow, a skill that promises to add a touch of elegance and personalization to your gifts and decorations. The most crucial aspect of effortlessly tying a bow is to avoid overthinking the process. The goal is to craft beautiful bows without requiring advanced skills or specialized tools.
The first step towards bow mastery is gathering your materials. You'll need ribbon and its a good idea to have a few different types on hand, to try out different effects. Wired ribbon often works best for making bows that will stand up on their own, such as those on wreaths. You'll also need scissors, and a zip tie or floral wire to secure the bows center. A spool of ribbon is useful because it allows you to cut as much ribbon as you need to make the size of bow you like.
Begin by cutting a piece of ribbon. Its always best to err on the side of too much ribbon, giving yourself ample room to work. As you learn, you'll develop a better instinct for the ideal length. Wrap the ribbon around an average-sized gift box to get an idea of the length required, and then allow an extra 60cm (or 24 inches) on each side of the ribbon to make the bow. You can, of course, use any type of string or ribbon for a classic, basic bow. Consider having a variety of ribbon options on hand; this will help to keep your crafting endeavors more exciting and dynamic.
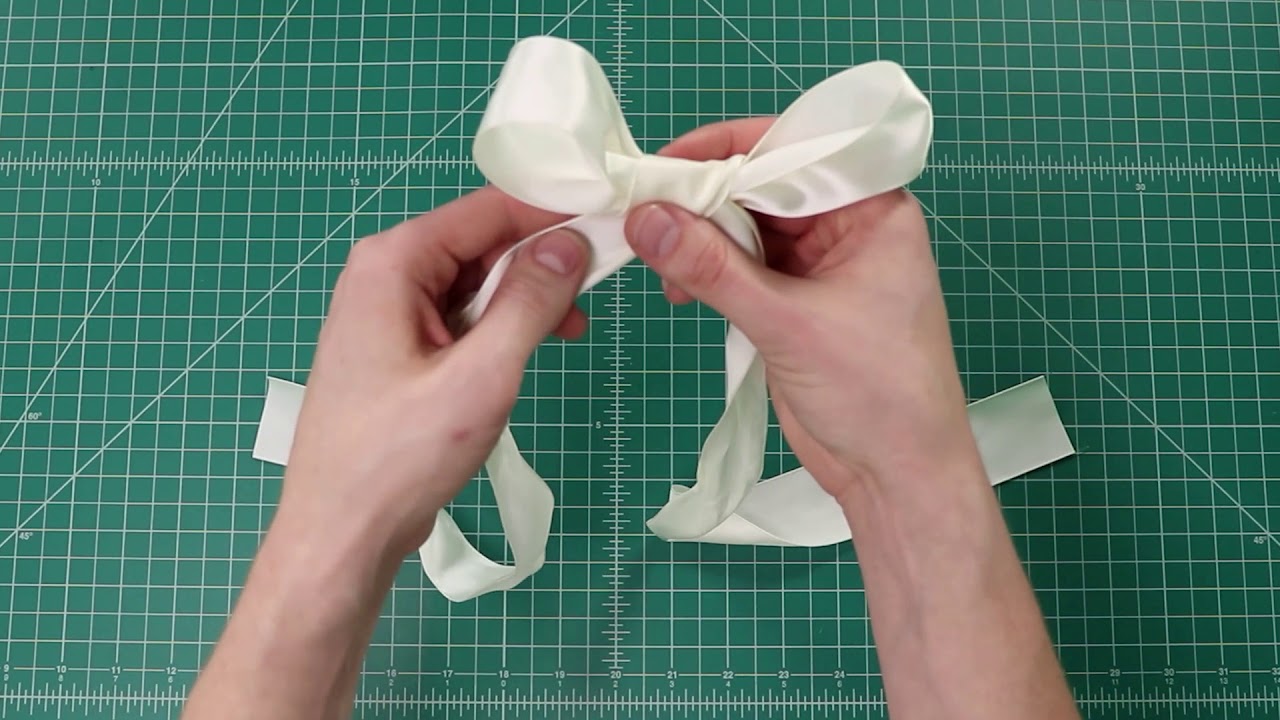
The process typically begins with a knot. If you're wrapping a gift, first wrap the ribbon around the package, and then tie the knot on top. Make sure the knot is in the center of the ribbon. Some tutorials suggest tying a knot in the center of a piece of ribbon, and then working from there. As long as the left and right ends stem from the knot in the center, your bow will look great.
Next, create a loop. Form a loop with the ribbon to the left of the knot, and make sure to do so with the same amount of ribbon on both sides. This gives the bow a balanced appearance. The most critical step, the foundation of a beautiful bow, is the knot. It anchors the bow and is the starting point for its overall shape.
Once the knot and the loop are done, it's time to move on to shaping the bow. Make another loop to the right of the knot, mirroring the first loop. This creates the classic bow shape. The loops should be roughly the same size, maintaining a symmetrical appearance. You can experiment with varying loop sizes depending on the style you prefer. With each loop, the bow's potential to become a masterpiece grows.
To secure the center of the bow, use a zip tie, a piece of floral wire, or a twist tie. Alternatively, a pipe cleaner can do the trick. Make sure it's long enough to wrap around and secure the bow.
Once the bow is complete, the final step is to trim the ends of the ribbon. This gives the bow a polished look, and it can be customized to suit various styles. Use sharp scissors to cut the ribbon ends at an angle. This can create a decorative 'V' shape or any style you desire. Alternatively, you may opt to notch the ends to create a more decorative edge.
There are all kinds of ways to tie a gift bow, ranging from super simple to more complex. "Here are 5 ways to tie the perfect bow," is a popular title that offers various techniques and tutorials. Another well-known approach is the "simple bow", which is easily achievable, and perfect for beginners.
One way to make a DIY bow includes a video tutorial so you will be a master perfect bow maker in no time. This offers a visual guide that simplifies the process. You can download a printable bow guide that can assist you. These resources are useful for anyone who wants to learn at their own pace.
Bows are the best finishing touch to any present, and there are numerous styles available. You can learn to tie a perfect bow using seven of your favorite styles, and even make one with your Cricut, if you're feeling creative. You can easily make a simple bow with ribbon to deck up Christmas wreaths, garlands, and all kinds of holiday decorations. This is also a great way to top off the presents under the Christmas tree. The pretty decorations can even jazz up an outfit.
Crafting a ribbon bow doesn't have to be daunting. By avoiding overthinking and following clear instructions, anyone can learn how to do it. There are some ribbon bow tutorials that are complex or require gadgets. To make your own ribbon bows is a great alternative to store-bought options, if you're ready to ditch the sticky commercial bows.
A helpful tip: to estimate the length of ribbon needed for tying it around a box and then making a bow, wrap the ribbon loosely around an average-sized gift or box. Allow for an extra 60cm (or 24 inches) on each side of the ribbon to make a bow. This is a great way to add some flair to your craft projects.
Consider using different colored ribbons to create different types of bows, for a variety of package sizes. You can use them on your sewing, yarn, wedding, or paper crafts. It's a handy skill to have in your craft arsenal. These DIY ribbon bows make a perfect Christmas tree bow, either for nestling in the branches or a tree topper bow.
In this video, we will be tying bow knots of ribbons to decorate our gifts, the Christmas tree, postcards, headbands, hair clips, and basically anything else you can think of. You can make a simple bow with ribbon for the many holiday decorations that are popular, like wreaths and garlands, in addition to gifts under the Christmas tree.
If finding the perfect gift seems to be an impossible task, at least you can rest assured that your present will look incredible! You can also give your bow a personal touch, or make it a work of art by adding decorative elements. To give the gift an extra special touch, use a variety of ribbons. Get a spool and that way you can make the bow as big as you like.
It seems like around the holidays, theres always something that needs a little finishing touch, and knowing how to make a bow out of ribbon is a great way to add that extra holiday magic. "Here are 5 ways to tie the perfect bow," or "5 ways to tie a bow the simple bow," are a few starting points.
Remember that this easy tutorial isn't a fancy bow that takes a lot of time and needs three hands and 42 fingers to hold together while you craft. Secure the center of this pleated ribbon with a small zip tie. This easy ribbon bow tutorial is a DIY bow tutorial that will teach you an easy way to make quick bows for easy crafts. Today, you can learn how to make a bow 4 different ways.
As you learn to master the art of the ribbon bow, remember that the best way to truly grasp the craft is through practice and experimentation. Be patient, and embrace the chance to discover new styles and techniques. And always remember that the ultimate goal is not just to adorn your gifts and decorations, but to bring a touch of joy and artistry to every project.

